Knowledge Article
Making REST API calls to Identity Security Cloud via Postman
Author
lisa_ivy
SailPoint
Postman is a fully-featured purpose-build REST API client application. It is available for Windows, macOS, Linux, and even your Chrome browser. To download Postman, go to http://getpostman.com.
For some basic information about making API calls with Identity Security Cloud, check out this guide here.
Making REST API calls to Identity Security Cloud via Postman
Postman makes it very straightforward to make calls to the Sailpoint API endpoints. In order to prepare to make API calls in Postman, there are a few things we will set up. First, we will set up a workspace, environment and our API collection. Then we will define environment and collection variables. Finally, we can run a test API call to establish connection.
Note - The Postman UI may update periodically and may make any screenshots or specific instructions slightly out of date. You can always consult Postman documentation to see specific setup instructions if something has been updated.
Generate Credentials
In order to make API calls to the Sailpoint API collections, you must have proper authentication. You will do this by generating a Personal Access Token (PAT).
- In the Identity Security Cloud UI, generate the client ID and client secret
- Log into your tenant as a user who has the Admin authorization level.
- Navigate to your profile by clicking the profile icon in the top right corner, then go to Preferences > Personal Access Tokens.
- Click +New to generate a new Client ID and Secret.
- A popup will appear, prompting for a description of how the key will be used, an expiration date and then a list of possible scopes for the token. Fill these out accordingly. If you want a scope that can do everything, you can search for sp:scopes:all
- Next, a Client ID and Client Secret will be shown to you. You will want to document both values for later use
- Important! This is the only time a Client Secret will be shown to you, so please take note of both values. If you don't, you'll need to repeat these steps!
Workspace and Environment
1. Find the Workspace dropdown, often at the very top left of the Postman UI. Here, you can create a new workspace, or select one you have previously created in order to work within.
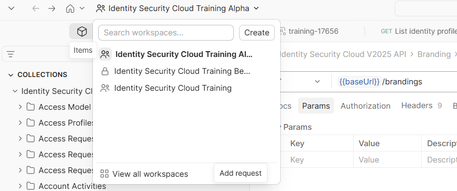
2. Once you've set up a new workspace, you can click on the + button and select Environment to create a new environment to work in. You will probably want a separate environment for sandbox use vs production use. Give your environment a clear name to indicate what it will be used for.
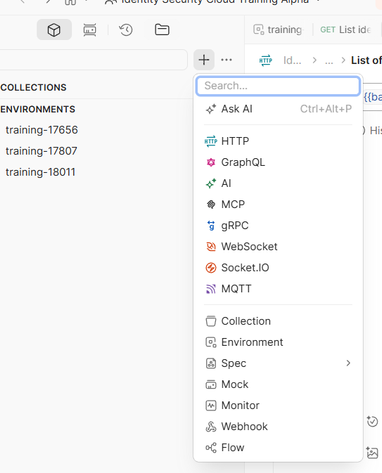
3. From the Environments tab on the left, or the Environments dropdown on the right, select the newly created environment.

4. Use the Environments tab on the left to click the environment to open the Environments variables tab in the center of the Postman UI.

5. Create 3 new variables as follows:
Variable Name | Value |
tenant | Name of the tenant, examples: yourorg-sb or yourorg(for prod) or training-number (for training tenants) |
clientSecret | Value of clientSecret you got from your PAT in the UI |
clientId | Value of clientId you got from your PAT in the UI |
Collections
1. In a browser, navigate to the Identity Security Cloud Postman Collections. Once there, sign into your Postman account in the browser.
2. Identify the API collection you wish to use (example v2026, v2025, v3, etc) and click the ellipsis icon next to the collection and choose Fork.
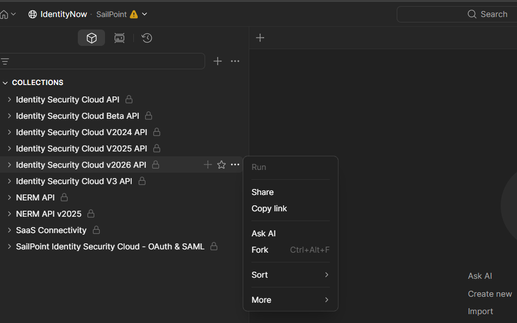
3. Give the fork a label/name, and choose the workspace you had previously created, and then click Fork Collection.
4. Return to the Postman app and look in the left side for the Collections tab, and ensure that the new collection is now there.
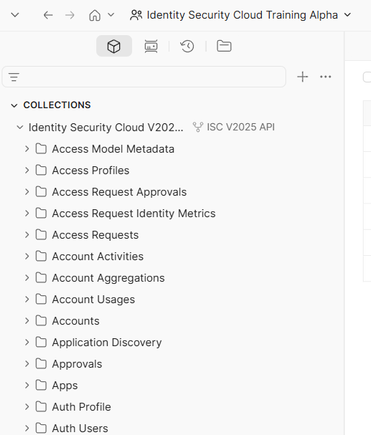
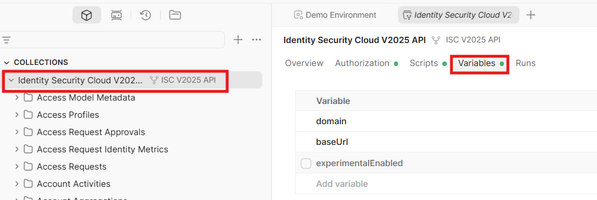
5. In the left panel, click on the name of the Collection to open the Collection Overview pane in the center. Choose the Variables tab to check on the Collection variables to ensure they properly reflect your tenant's baseURL.
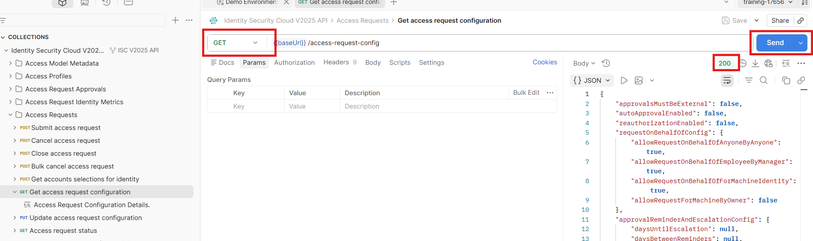
6. Finally, from the collection, choose an API endpoint to use as a test to establish connection. Choose a GET method endpoint, for example Access Requests > GET Access Request Configuration. When the API opens, click Send and if you receive a 200 response code, then you are ready to start making API calls.